Showing posts with label brewer diet. Show all posts

Tuesday, March 10, 2015

homemade ricotta

One of the things that has been so fun and interesting for me as I ventured into a real-food diet has been the evolution of my concept of consumer choice.  For instance, your standard American mom makes a grocery list based on some recipes she wants to make (or maybe she doesn't even make a list - she just goes to the store and sees what looks good), goes to the grocery store, buys what she needs to make what she wants, and goes home.

I'm kind of doing things backward now!  I buy a half-cow in various cuts, then I look in my deep freeze at the beginning of the week and think about what I can make with what I have.  I get my CSA box and see what will spoil first, and plan on cooking those vegetables early in the week.  And we do a static dairy order each week - we can only change at the new order for the month.  So, if I ordered a gallon of milk, I get a gallon of milk each week, whether I want it or not.  And then I need to figure out what to do with it before it sours!

This may sound like a lot of work, but I really think it's a lot of fun.  It's about being resourceful and imaginative.  And once your brain gets used to shifting the order of operations a bit, it becomes second nature.  

Preserving dairy is a great extension of this resourcefulness.  Whatever we don't bake with or drink straight up or in coffee gets turned into butter, yogurt, puddingice cream, sherbet, mozzarella, ricotta, or ricotta salata.  I have shared most of these recipes with you already, but today let's talk ricotta!  


Ricotta is really the easiest soft cheese to make (aside from labneh, which is just strained yogurt).  And the uses are endless!  You can ripen it in the fridge to make ricotta salata, which is a salted, dried, aged version.  You can dollop it on a white pizza.  You can mix with salt, olive oil, and fresh herbs for a nice dip.  You can fold it into a cheesecake.   You can mix it into pasta (a traditional lasagna is my favorite!).  It has a mild, creamy texture and flavor that really make it versatile.  

So here's how you do it.


Start with a quart of whole milk.  (Raw, pasteurized, whatever.)


Heat gently to 95 C (~205 F).  I do this over medium heat, stirring frequently.


Meanwhile, mix 1/2 teaspoon citric acid with a few tablespoons of cool water.


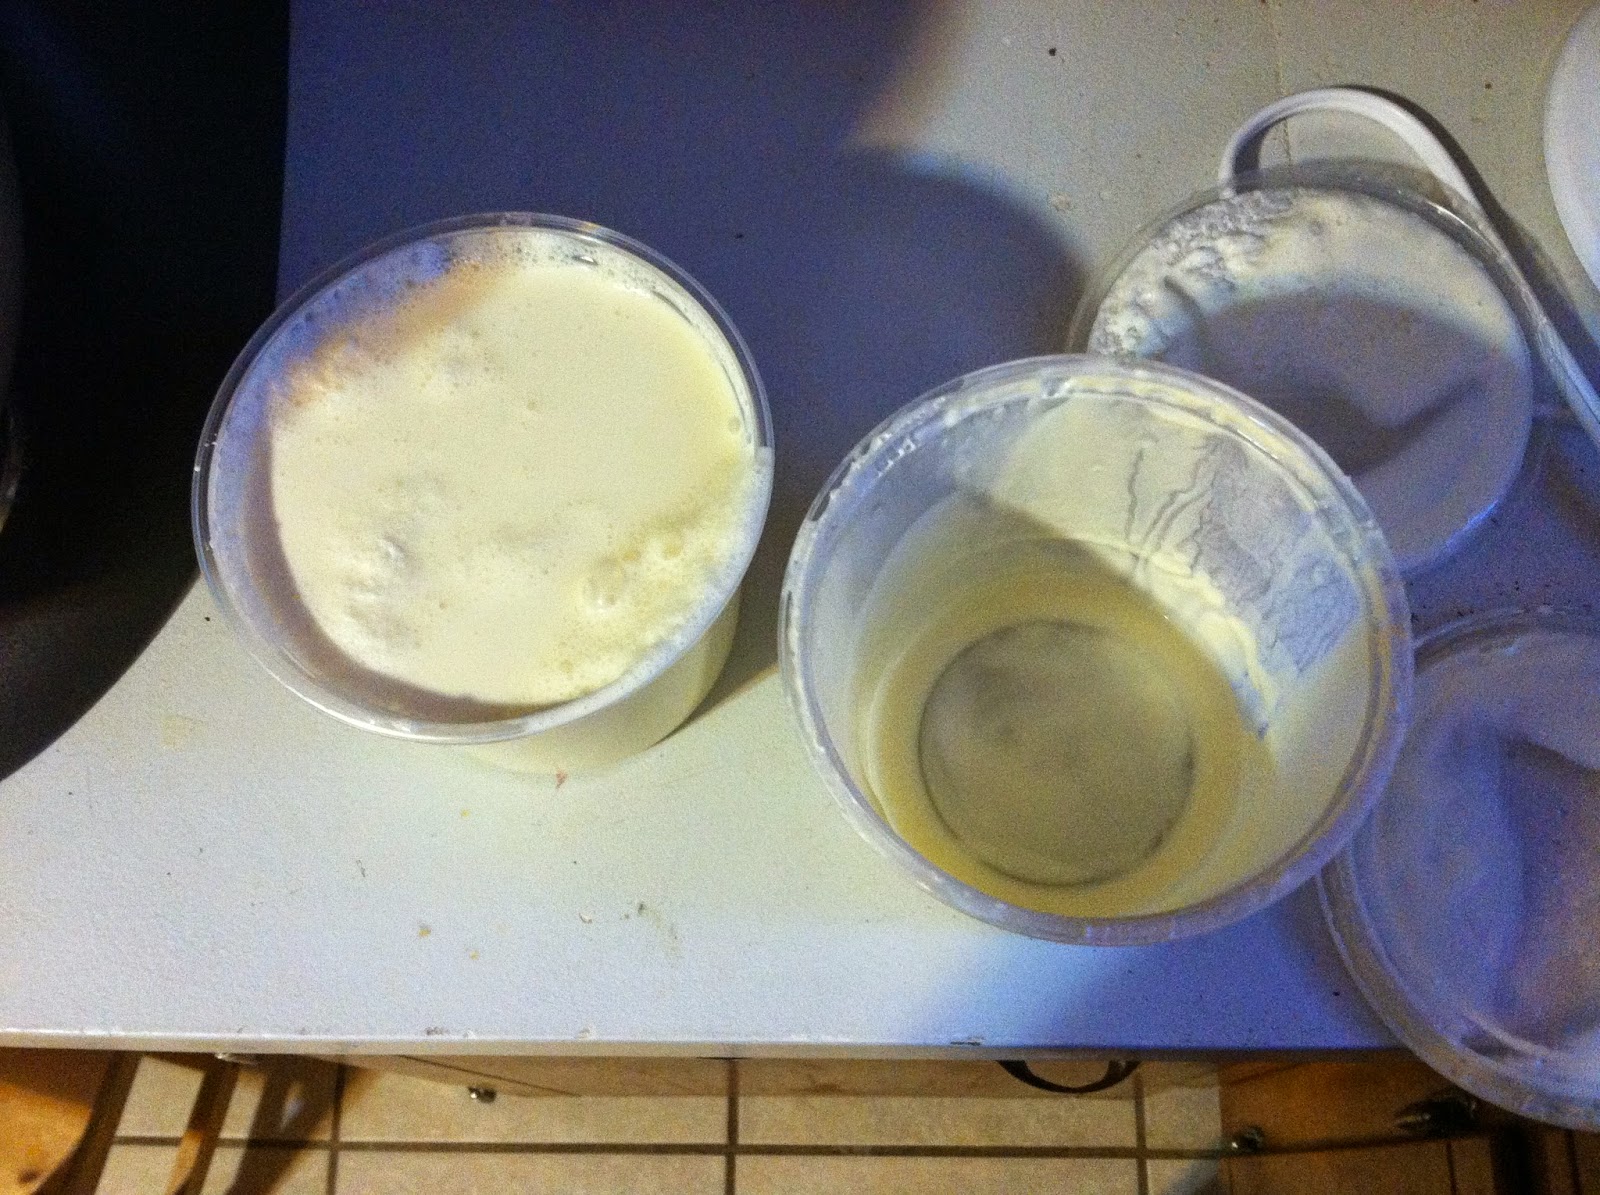
When the milk is up to temp, pull it off the heat and stir in the dissolved citric acid.  The milk will begin to curdle immediately.  Cover and leave it for half an hour.


This is what it will look like when the half-hour is up - totally separated into curds and whey.


I use a ricotta strainer basket to drain off the whey.  I just discard it.  Some people save it to feed to their plants or things like that.  The whey at this point has lost all its probiotic quality due to being heated so high, so it's not a very useful dietary supplement.  You can strain it to your desired dryness. 


After straining mine for about an hour, I turn it out into a container.  

And there you have it!  Fresh, creamy, homemade ricotta, waiting in your fridge for you to eat it up!

From a quart of milk, I will get about 8 ounces of ricotta.

Have you ever ventured into cheesemaking?  Tell me about it!

[This post submitted to Fat Tuesday 3/10/15 and Simply Natural Saturday 3/7/15.]


Thursday, March 5, 2015

nine ways to eat your cabbage!

Seasonal eating . . . It's what I'm committed to.  It's what I stand for.  It's the right way to eat - the way our great-grandparents did it!  It . . .

Starts to suck really bad in February.  Seriously.  Here's what we get in the dregs of winter:  cabbage, hard squash, turnips, cabbage, sweet potatoes, potatoes, cabbage, onions, carrots, broccoli, cabbage.

A lot of cabbage.  Those heads of cabbage are huge!  I currently have no fewer than five cabbages in my fridge.


I'm lucky that I like cabbage.  But there's only so much cabbage a gal can take.  I put together all my favorite cabbage recipes here, in case you are in a situation of cabbage richness similar to mine.

Here you go - nine ways to eat your cabbage!

Sauerkraut - the classic gateway drug to lactofermentation!  It really couldn't be simpler.  Slice your cabbage very thinly and then weigh it.  For every pound of cabbage, add two teaspoons of salt.  Put it all into a great big mixing bowl and start kneading it with your hands like bread.  Crunch the cabbage shreds between your fingers and press it all together.  Soon it will start to release liquid.  Once you can grab a handful and squeeze it and liquid trickles out of your fist, you are ready to jar it!  I usually do quart-size jars.  Pack the cabbage very tightly into jars.  Use a wooden spoon handle to tamp it down in layers before you add more.  You want the liquid to cover the top of the cabbage.  Once it's full, put a lid on loosely and leave it on your counter for a few days.  It will start to bubble.  Taste it after three days.  Is it nice and sour?  If so, cap it tightly and refrigerate (or cold storage).  If not, let it go longer.  Taste each day until it's ready.  Kraut will last basically indefinitely in the fridge.  It is an amazing natural source of probiotics.  I eat a tablespoon-full every night before bed to settle my stomach.

Pickled Cabbage Salad - I adapted this one from Smitten Kitchen.  Mix up a brine of 3/4 C white vinegar, 3/4 C water, 3 T sucanat or sugar, 1/4 t celery seeds, 2 t sea salt.  Heat the brine until everything is dissolved.  Meanwhile shred a pound of cabbage.  Add a julienned carrot.  Pour the brine over the shredded veggies and let it sit for several hours.  It will get better each day (refrigerated)!  This is awesome on Korean beef tacos or as a side to any rich meat.

Vinegar Slaw - This is the bare-bones version of cole slaw that I prefer!  No mayo.  It's perfect on BBQ pork or brisket sandwiches.  Shred 1/2 a head of green cabbage.  Mix 1/4 C sucanat or sugar, 1/4 C white vinegar, and 1 T salt.  Toss it with the cabbage and let it sit for several hours before serving.

Cabbage, Noodles & Bacon - This is one of my all-time favorite comfort foods.  Something about the piquancy of the vinegar against the richness of the bacon, the texture of the cabbage with the noodles.  I just love it.

Braised Cabbage - With both apple cider and cider vinegar.  This is SO freaking good.  Cabbage + apple + bacon is such a natural flavor combination.  Plus Tom Colicchio can do no wrong.

Cabbage Rolls - Leave it Ina Garten, my personal favorite and the queen of Jewish soul food, to give the perfect recipe for this comforting dish.  It takes a little bit of preparation, but it's no harder than a lasagna!

Cabbage & Rice Soup - This is one I came up with on the fly to use up leftovers.  It was perfect.  I took a mix of homemade chicken and pork stock from the freezer - maybe 2 cups.  I added 1 cup thinly shredded cabbage and let that all come to a boil, cooking until the cabbage was tender.  Then I added a cup or so of leftover sesame-scallion rice.  After it heated through I added a half-teaspoon or so of Sambal Oelek.  It was rich and comforting from the stock, filling with the rice, and pleasantly spicy.  Such a good lunch.

Asian Slaw - This is a big favorite in the family for picnics and potlucks.  This deviates from my Real Food ways a bit, since it uses the noodles and spice packet from a package of instant Ramen noodles.  But hey - you only live once, right?  Have some Ramen noodles.  I basically use this recipe, but instead of bagged coleslaw mix, I do 1/2 a head of shredded cabbage and two shredded carrots.

Cabbage & Noodles - This is supreme comfort food that I learned from my days living with my old friends Stephanie and Julie.  Julie's parents brought up all their children as vegetarians, and they had four kids!  So they needed economical ways to feed the family.  You basically just take a head of cabbage, an onion, a one-pound bag of egg noodles (or a pound of fresh), a bunch of butter, and some salt.  Very thinly slice the onion and cabbage.  Take your biggest pan and saute them in 4 T butter and a few teaspoons of salt (I also added about a teaspoon of caraway seeds last time - very nice).  While that cooks, bring a big pot of water to a boil and add the egg noodles.  Cook until they are done, then drain.  Once the cabbage and onion are very soft and starting to caramelize (maybe 20-30 minutes), add the noodles to the pan and add another 4 T butter.  Taste and add more salt as needed.  Stir well so the noodles are totally coated in butter.  Feed an army and enjoy.

So - do you have favorite cabbage dishes!?  What have I forgotten?

[This post submitted to the HomeAcre Hop 3/5/15.]

Thursday, February 26, 2015

like buttah


Except it's not just like butter.  It actually is real butter!  I just realized I've never given you a post on how I make butter.  I'm kind of embarrassed to do it, because it's not much of a "recipe," to speak of.  It's just a series of actions with one ingredient that takes about half an hour.

And that half an hour each week is totally worth it to me!  To have fresh, raw, local butter.  At a great price!  (Works out to about $6/lb for me.)

Here's what I do.

Each Monday evening, we pick up our milk from the co-op.  We usually get one gallon of milk, one pint of cream, and one dozen eggs per week.  We bring it home, and I pull whatever cream was left from last week out of the fridge.  I combine it with whatever cream I won't be using for recipes during the week from the new pint.  Usually it works out to about a pint or so of cream altogether.  Sometimes I wait until I have more cream built up and do a quart at a time.  Your preference.  The more cream you use, the longer it takes to curdle, but then you have more butter.  You can always freeze the excess if you'd rather do a big batch at once.


You have a choice at this point.  Do you want:

1)  Sweet cream butter?
      Pros:  neutral flavor, good for baking, can be made with cream straight out of the fridge.
     Cons:  shorter shelf life on the counter, leftover buttermilk is basically just skim milk and cannot be used as an acid in baking (unless you add some additional acid to it, like lemon juice or vinegar).

or

2)  Cultured cream butter?
      Pros:  slightly tangy flavor, European-style, longer shelf life on the counter, leftover buttermilk is cultured and behaves just like store-bought buttermilk in baking (that is, it acts as an acid with chemical leaveners like baking soda.)
      Cons:  not as good for baking because of flavor profile, the cream must sit and culture first at room temperature.

If you want to culture, it's really easy:  just sit the cream on the counter and leave it for 12-24 hours before you make butter.  Done.  I always make sweet cream butter, just because I prefer the flavor.

So here's how I make the butter:

I put the cream into my stand mixer with the whisk attachment.


I cover the whole thing with a dish towel (or you will splash buttermilk in places you didn't even know existed in your kitchen!).

I turn it on to a moderately high speed (maybe a 6 on my Kitchenaid), and let it whip.

Just leave it alone and let it do its thing.  It will turn into whipped cream,


then it will break and shrink back down,


and finally it will begin to separate into butterfat and buttermilk.


I stop it just one time, after the whipped cream has broken, to scrape the sides of the bowl and be sure it is all incorporated.  For a pint of cream, this stage generally takes about 20-30 minutes.  If you have more cream, it will take longer.

When it's fully broken, you will hear a lot of sloshing in the mixer bowl.  Stop the mixer and strain the butter away from the buttermilk.


Put the butter curds into a large mixing bowl.

Use the back of a wooden spoon to press as much moisture as you possibly can out of the curds.


Spread the butter around the bowl with the spoon and then push it together.  A lot of buttermilk will continue to come out of the butter.  Drain it off into the jar with the other buttermilk.  Really work as hard as you can to get the buttermilk out of the butter, because any liquid left in the butter is what causes it to spoil.  I usually knead the butter with the spoon for about 5-10 minutes.  Some people do this with their hands, but I've found my hands are way too warm and they just end up with melted butter smeared all over them and wasted.

Once you are satisfied that no more buttermilk is coming out, put your butter into a glass dish and either keep it on the counter to use immediately or in the freezer for storage.  I always keep some out so it's spreadable.  I find that the butter will taste sweet and good for 2 weeks in winter, and closer to 1 week in summer.


Enjoy!

[This post submitted to Fat Tuesday 2/24/15 and the HomeAcre Hop 2/26/15.]

Tuesday, February 10, 2015

new england clam chowder

It's been a nice cold snap!  In general, I think that people in Nashville are sort of wimpy about the winter.  Growing up in Kansas gave us a very solid winter season - tons of snow, bright crisp days, the whole nine yards.  In fact, the year that Vicki was born, we had just had our final blizzard in Topeka a few days before she came . . . in April!  Winter in Nashville is not as severe (which is good, because the second there is ice on the road, everyone forgets how to drive), but it's also not as beautiful.  It's mostly gray, kind of rainy, and a little depressing.  But this latest cold front has been lovely.  Freezing air that smacks you in the face the second you walk outside.  Blue skies with nary a cloud in sight.

I actually love winter because I am always hot.  I sweat a lot.  Winter is the only season each year that I feel relatively comfortable all the time.  And it's the only time I really enjoy drinking hot beverages (aside from coffee, which really should be its own food group in my daily diet) like tea or cocoa, and eating lots of warming soups.

Clam chowder has always been a favorite of mine.  The creamy texture, chunks of potatoes, faint salty background from bacon, and bits of chewy clam - yum.  We made a pot last night and dipped sourdough rolls into it, although I know that oyster crackers are more traditional.  I meant to also make a massaged kale salad to go alongside, but I forgot.  And no one complained!  This is a very nourishing and nutritious soup:  homemade chicken stock for lots of minerals and collagen, clams for tons of iron (more per ounce than beef!), grass-fed milk and cream for fat-soluble vitamins.

I always use canned clams because we are landlocked and finding fresh clam is not worth the trouble or the price.  But if you are near the coast - by all means!  Use fresh clams.  You would need between 3 and 4 pounds of fresh unshelled clams to yield 13 oz of clam meat.  Just steam them until they open, allow them to cool, pick the meat and save the juice.

New England Clam Chowder
3 oz bacon or salt pork (we used cured jowl from our recent half-hog purchase), sliced into 1/4" pieces
1 onion, finely chopped
2 6.5 oz cans of chopped clams in clam juice
1 C chicken stock
2 1/2 C peeled, chopped potatoes (3-4 medium russets)
1 t Worcestershire sauce
1/4 t ground thyme
1 C milk
1 C cream
2 T flour (use sprouted if you prefer)
salt and pepper


Serves 4-6

Place bacon pieces in a large saucepan over medium heat.  Allow them to crisp and render until they are totally done.  Remove them to a plate and leave the fat in the pan.

While the bacon is cooking, open the cans of clams and drain them, reserving the juice.  Measure the juice and make sure you have one cup.  If not, add water or more chicken stock to make one cup.  Set clams and juice aside.

Place chopped onion in hot bacon fat.  Allow it to cook for 7-10 minutes, until totally soft.

Add clam juice, chicken stock, potatoes, Worcestershire sauce, and thyme to the pot.  Bring it up to a boil, then reduce to a simmer.  Cook until the potatoes are tender (15 - 20 minutes).

While the soup is simmering, whisk together milk, cream, and flour.

After potatoes are tender, add clams as well as the milk/cream/flour mixture.  Allow it to come up to a simmer.  The flour will begin to thicken the soup slightly.  Taste the soup and add salt and pepper as needed.

Serve with warm sourdough rolls or oyster crackers, and pass the bacon bits you saved from the beginning to top the bowls of soup!

[This post submitted to Fat Tuesday 2/10/15, Real Food Wednesday 2/11/15, and the HomeAcre Hop 2/12/15.]

Monday, November 17, 2014

menu plan november iii

We have returned from Retreat!  It was a cold, blustery, awesome time.  The kids love playing up there, and I enjoy having a break from the routine and breathing the fresh mountain air.  We even did a little hiking!

But now we are back to reality.  We are nearing the Thanksgiving holiday, and I'm excited!  We get a big shipment of 8 pounds of organic cranberries this Thursday, and I am so pumped to make cranberry sauce with natural sweeteners and can it up to take to my sister's!

So, down to the nitty gritty.  Here's what we're eating!

Some notes:  we literally always have one of two things for breakfast if we are at home.


1)  -- scrambled eggs from our Mennonite hens
     -- homemade sourdough toast/English muffins/biscuits
     -- raw butter we have been making from our Mennonite cow cream
     -- local raw honey or homemade preserves
     -- seasonal fruit from our CSA or something I canned like peaches, pears, or applesauce

2) -- pancakes
    -- raw butter
    -- real maple syrup
    -- seasonal fruit

Vicki usually requests #2.  If we have time, I'm happy to oblige.

Since it is so monotonous, I'm not going to put breakfast on the menu plan.

Lunches are pretty much always leftovers.  If I do some actual cooking for lunch, I will put it in the plan.  If not, just assume it's something unexciting.

For drinks, we always have raw milk on hand.  We also drink Berkey filtered water, kombucha, or homemade soda from our ginger bug.  Lately I've been drinking the buttermilk left after butter-making - yum!

Finally, I try to make one dessert-ish item that we nibble on all week for snacks and desserts.  This week I'm making up a batch of brown rice pudding from some leftover rice.

Sunday
-- lunch:  we got away from the Retreat early enough to stop in Manchester
-- supper:  we are bringing an appetizer to Family Dinner.  We have been having a crazy challenge to try to use up this jar of red curry paste . . . long story.  Anyway, we made a red curry peanut dip and brought veggie sticks.

Monday
-- supper:  black bean and sweet potato enchiladas, Spanish rice with spinach

Tuesday
-- supper:  cheeseburgers on sourdough buns with fixings (tomato, onion, homemade ketchup, mustard, homemade kraut, pickle relish), cinnamon sweet potato fries

Wednesday
-- supper:  broiled sesame-soy salmon on a bed of wilted tat soi, steamed rice

Thursday
-- supper:  roast pork loin with apples, roast cabbage wedges and potatoes

Friday
-- supper:  pizza on sourdough crust with homemade mozzarella, ricotta, acorn squash, and pears

Saturday
-- lunch:  chicken tortilla soup


-- supper:  roast chicken, mashed potatoes, callaloo of mustard greens, fried green tomatoes

What are y'all eating?

[This post submitted to Menu Plan Monday and the Homestead Barn Hop 11/17/14.]


Sunday, November 9, 2014

meatloaf, smeatloaf, double-beatloaf . . .


We're getting into the season for watching A Christmas Story!  My favorite scene is where the mom keeps trying to sit down to eat while her kids and husband continually ask her to get stuff for them from the kitchen.  The narrator says, "My mom hadn't had a hot meal for herself in 15 years."  So true, so true.  I also love when Ricky, the little brother, is complaining about how much he hates meatloaf.

When we bought our half cow last spring (I still have to tell you about that, don't I?), we got a lot of ground beef.  It's sort of the nature of the thing.  Not every part of a cow is fit to be sliced up into steaks.  A lot of it is scrap and bits that need to just be all tossed together and ground up.  In our menu plans, ground beef figures prominently.  We eat it one night a week, usually on Tuesdays.  There are a lot of things you can do with ground beef!  Burgers, Korean beef, chili, hamburger corn pone (this is an amazing Southern dish I will write up soon!), meat sauce for pasta, beef tacos, BBQ beef, shepherds pie, or . . . meatloaf.

I have a few tricks I incorporate into a standard Better Homes & Gardens meatloaf recipe, so check it out:


Classic Meatloaf
2 eggs
3/4 cup milk
1 C breadcrumbs (3/4 C if totally dry, 2 C if totally soft - see below)
1/4 C grated onion
1 T dried parsley (or 3 T fresh)
1 t salt
1/2 t dried oregano (or 1 1/2 t fresh)
1 1/2 lb ground beef
1/2 C ketchup
1/4 C sucanat or brown sugar
2 t yellow mustard

Makes 6-8 servings.

Oven 350 F.

Start by mixing the eggs and milk in a large bowl.


Add the breadcrumbs.  This is a great time to use up that heel of your homemade sourdough loaf, or the cracker crumbles at the bottom of your yogurt dough cracker bag.  If your bread is very fresh and moist, aim for 2 cups of crumbs.  If your bread is stale, aim for 1 cup of crumbs.  If you are using cracker crumbs or the fine breadcrumbs you buy in a canister from the store (which I don't recommend!), do 3/4 cup.  If you are making your own, just whiz it up in the food processor.


Add the onion.  This is one of my tricks.  You never properly cook the onions in a meatloaf, and you don't want to crunch into a big chunk of onion while you're eating.  So grate them on a box grater (I have a little tiny one - isn't it cute?!), and then add the grated onion and juice to the bowl.


Add the parsley, salt, and oregano.


Mix well, then add the ground beef.  Mix it all very thoroughly with your hands.


Now, here is another one of my tricks.  Honestly, my favorite part of the meatloaf is the outer crust glazed with sweetened ketchup.  I want more surface area. I don't use a loaf pan, because it limits my crust.  I also make mine into two loaves, because one again - more surface area for glaze!  So shape your meat mixture into two equally-sized loaves on a baking sheet.


Pop it into a 350 oven for an hour or so, until they read 160 F on a thermometer.  Meanwhile, mix together the ketchup (a great time to use your own homemade ketchup!), sucanat/brown sugar, and mustard.


After the loaves are up to temperature, paint them with the ketchup glaze.  Put them back into the oven for ten more minutes, then let them rest for ten minutes before enjoying!

\[This post submitted to the Homestead Barn Hop 11/10/14, Real Food Wednesday 11/12/14, and Pennywise Platter 11/20/14.]

Thursday, November 6, 2014

making mozzarella

Cheese.  Glorious, homemade, creamy, cheese from grass-fed cows living a perfect Mennonite life.  Dudes, it just doesn't get better than this.

We get a gallon of milk from our farmer every week, rain or shine.  Because my kids are little, we struggle to drink the full gallon each week and usually have between 1 and 2 quarts left.  I refuse to dump it, so it either becomes yogurt, ice cream, or cheese.

My friends Parth and Julianne gave me a stupendous gift for my birthday this year -a cheese-making kit!   It had everything I need to make ricotta, ricotta salata, mozzarella, and burrata.  Do you know the joy of making a lasagna in which every item has been made from scratch, including the cheese?  It's an intense amount of joy.  Ricotta is easy and fast, and ricotta salata is easy but takes time to cure.  Mozzarella, on the other hand, is a little bit hard.  There are some elements to it that are sort of like bread-baking - you just have to do it over and over and then you know.  But I promise that it's worth it.  The taste just doesn't compare to what you can buy at the grocery store.

Let's get started, huh?  Cheese awaits us.


Cast of characters:  a half-gallon of good milk.  Doesn't have to be raw, but use the best-quality whole milk you can find.  Citric acid, calcium chloride, and rennet can all be found at cheese-making supply stores, or ordered online.  I've also found that a lot of brewing-supply shops carry cheese-making stuff.  If you're local to Nashville, All Seasons Brewing on 8th Ave. S. has everything.  And salt!


Start by putting the cold milk in a pot and adding 1 mL of calcium chloride, along with 1 t citric acid diluted in 2 T cool filtered water.


Heat the milk gently over medium, stirring constantly, until it reaches 32 C.  Have ready 1 tablet vegetable rennet dissolved in 2 T cool filtered water.  Having a good thermometer is essential!


When the milk reaches 32 C, add the rennet and stir briefly to dissolve.  Then cover the milk and let it sit for 30 minutes or so, until the curd is firmly set.  You can tell this by cutting into it slightly with a knife.  If it makes a clean cut, you are ready to go.  If not, leave it for awhile longer.


If the curd is ready, use a long knife to cut it into a checkerboard pattern.


Then place the curds back over medium heat, stirring constantly, until they reach 42 C.  They will change in texture during this time and become more stretchy and pulled-together.

Once the curds reach 42 C, dump them into a colander lined with cheesecloth, an old clean pillowcase, or a floursack towel.  Save some of the discarded whey if you are wanting to store your cheese after it's done.


Let the curds drain while you prepare your stretching water and your ice water.  Rinse out the pot you heated the curds in and fill it with fresh water.  Heat that water to 70 C and then remove it from heat.  While it heats, fill a medium bowl with cold water and add some ice and salt.


Okay, stretching.  This is really the tricky part.  I use rubber gloves because that hot water is really a little too hot for comfort.  Gather your curds together into one mass, and dip it into the hot water.  Leave it for about 10 seconds.  Pull it out of the water and begin stretching it like taffy.  Hold it with one hand and use the other to pull it away from you like a slingshot.  When it starts breaking rather than stretching, dip it back into the hot water for another 10 seconds.  Keep repeating this process of stretching and heating until it stretches smoothly and looks glossy.  Start stretching it into a ball by making a small circle with your fingers and palm and forcing it through the opening.  Try not to roll it, but rather mold it into a ball.  Once it is properly stretched and molded, drop it into the ice water.  Leave it there for 10 minutes or so, then it is ready to serve!  If you wish to store it, add a pinch of citric acid to the reserved whey and keep the cheese submerged in that in the refrigerator.

Yum!  I seriously have trouble not just slicing up this whole thing and eating it plain.


It will still have quite a lot of the natural moisture of the milk still in it, so if you want to grate it, it needs to be pressed and dried a bit first.  I tend to preferred it sliced rather than grated.  This mozzarella is an absolute essential to our Friday pizza nights.  I hope you enjoy it as much as we do!

[This post submitted to Real Food Wednesday 11/4/14 and Pennywise Platter Thursday 11/5/14.]

Tuesday, October 28, 2014

creamy kale & potato soup

Our Fall CSA is winding down for the year.  Our last pick-up will be November 8, and the nice hardy cool-weather crops are really starting to come in.  Hard squash, potatoes, sweet potatoes, collards, and kale.  We have been getting big bags of baby kale that are nice for salads and soups.  They don't need the rib taken out in the same way that mature kale does.  I needed to get through a bag quickly this week, and soup seemed like a natural, since kale wilts down so nicely.  We had a few red potatoes and some cream left after making butter this week.  This soup came together in a snap and I enjoyed it out in the Fall sunshine on the porch.

Creamy Kale & Potato Soup
serves 2
1 T olive oil
1/2 an onion, chopped finely
1 clove garlic, minced
2 medium red potatoes, medium dice
2-3 C baby kale (use mature kale if desired, but remove the large vein from each leaf), roughly chopped
2-3 C chicken stock
1/2 C heavy cream
salt and pepper

The cast of characters:  onion, garlic, red potatoes, kale, chicken stock, and cream.


Heat olive oil in a medium saucepan over medium heat.  Add onion and garlic and saute until soft.


Once they are soft (5-7 minutes), add diced potato and cook briefly.  Add chopped kale and allow it to wilt.  Season the mixture with 1/2 teaspoon salt and 1/4 teaspoon pepper.


Once kale is wilted, add chicken stock.  I freeze mine in ice cube trays and then store in plastic bags in the freezer.  

Bring to a boil, then lower heat and allow the soup to simmer until the potato is softened.  That should take about 20 minutes.  I let mine go for an hour or two, though, and it was fine.  

Just before serving, add cream, and taste for seasonings.  Add more salt and pepper as needed.

This soup was beautiful alongside a piece of homemade sourdough toast with fresh butter, a hunk of raw cheese, and a tall glass of homebrew kombucha.  Bonus points if you eat it outside on a brisk day with full sun!


[This post submitted to Real Food Wednesday 10/29/14 and Pennywise Platter 10/30/14 and the Homestead Barn Hop 11/3/14.]

Friday, September 12, 2014

macaroons two ways

So, eggs.  We have eggs every morning, scrambled in butter that I've been making from our raw cream.  I buy a couple dozen from our Old Order Mennonite farmer in Kentucky every week.  Eggs are sort of amazing because they're the only protein source that costs 20 cents apiece (in my case, each dozen costs $2.50).  I used to scramble two every morning and that was enough for us, since Vicki eats like a tiny little bird, and Todd was still sort of aiming things at his mouth.

But now we are entering the dreaded phase I knew would come . . . the one where my kids eat a bunch of food all the time.  I heard it gets worse.

So now I scramble three every morning.  Do the math . . . 3 x 7.  I use 21 eggs per week on breakfast.  That leaves three or so eggs a week for whatever else:  baking, meatloaf, ice cream, or (kids' favorite) - chocolate pudding.  Nevermind that it ends up smeared around the kitchen like finger paint.  Pudding is great for using egg yolks, but then you're left with those pesky whites.  Not much to do with them except meringue.

Or macaroons!

These are so simple.  Four ingredients.  It's really kind of a formula that I use, based on how many egg whites I need to use up.  For each egg white, use 2 T sugar (feel free to use an unrefined version like sucanat), 1/4 t vanilla, and 3/4 C unsweetened shredded coconut.

Now, you can go one of two directions here.

1)  You can whip the egg whites with the whisk attachment in your stand mixer, adding vanilla and slowly adding sugar, beating until glossy with stiff white peaks.  Gently fold in the coconut.  Drop onto a parchment-lined sheet and bake at 325 until the little meringue-y puffs are set and golden brown (about 20 minutes).  Remove to a cooling rack.  This method will make about 7-10 macaroons per egg white.

Or, 2)  You can mix the egg whites with the sugar and vanilla using a spoon.  Stir in the coconut and mix well.  Roll the mixture into 1-inch balls and place on a parchment-lined baking sheet.  Bake at 325 for about 25 minutes, until they are lightly browned.  This is the more traditional coconut macaroon texture - dense and rich.  You will get fewer macaroons per egg white doing this method - probably about 5 each.

Either way, these will be gobbled up by your children before you know what's happened.  And I guess that's a good thing, seeing as how these little ones need to eat!


Friday, August 22, 2014

cheezin'

I'm back!  I'm alive!  I'm here!  I haven't written anything since last December.

Yikes.

Well, I'm back.  And I'm gonna take it slow.

One place I have decidedly NOT been absent is Facebook.  Oh, how I love to hate Facebook.  And yet, in this season of early bedtimes and limited adult contact, it's my lifeline.  Checking up on people, following conversations, trying to offer encouragement.  And the groups!  I love all the little niche interest groups I'm part of.  In fact, that's really probably the most useful thing that Facebook offers me.  Nashville Natural Parents, The Young Clergy Women Project, East Nashville, and more.  But my favorite is Real Food Nashville.  It's a community of people who are dedicated to sharing resources and information in helping more people find more real food.

One thing that folks do frequently on Real Food Nashville is organize group buys.  These are like little ad hoc co-ops that spring up around one product.  So I've been in a group buy for grass-fed gelatin.  Or one for coconut oil.  That kind of stuff.  It's where I found my half of a grass-fed steer last winter (so much more to tell you about that!  Best purchase EVER).  I bought some superior satsumas and Meyer lemons last winter from a farm in Chickamauga through RFN.  And now, a couple of times, I've bought the most amazing raw grass-fed cheese I've ever encountered in my life.


So what makes this cheese so fabulous?

It's raw.  The milk that goes into this cheese is never heated past about 100 degrees F.  If you go beyond that point, you begin to denature the milk and break down the naturally occurring enzymes that help make it easier to digest and better for your body.

It's grassfed.  Cows that feed on grass make milk that is superior.  Grassfed dairy is higher in a host of vital nutrients than grainfed dairy.  This article is a great starting point for why grassfed dairy is the way to go!

It's not that expensive.  Now, don't me wrong.  This is more costly than the Kroger brand sharp cheddar I sometimes pick up.  But consider this:  "raw" cheese (which is usually heated past the point that allows enzymatic activity) at Whole Foods is typically like $20/lb.  These big beauties were $7/lb.

It's ordered farm-direct.  No middle man.  Minimal shipping cost.  More money straight to the farmer.

It's delicious.  When we did our first order back in April, I was a little wary about ordering five pounds of cheese at a time, knowing that cheese doesn't freeze well.  Our family is not huge and it seemed like an awfully large amount of cheese.  Well, I can confidently say that we breezed through that block of cheese in weeks.  My kids begged for it.

So - if this sounds appealing to you, think about starting this kind of group buy in your area!  Get to know the farmers that are near you.  Find good prices.  Talk to them about their practices.  And then support them.  This has a been a huge part of my philosophy of getting out of the grocery store.  As much as I can, I buy what I need from farmers or in bulk, and then make the rest.

One of the reasons I stayed away from the blog for so long is that I began to feel that I was way out of the mainstream.  Like I'm describing a lifestyle or diet that sounds not only unattainable for some people, but frankly unattractive or just too much work.  I hope that's not the way this comes off.  Hell, I ate a Taco Bell burrito for dinner on Wednesday.


80/20, baby.  80/20.

Monday, December 9, 2013

i love you a bushel and a peck . . .

Guys'n'Dolls?  Anyone?  Okay whatever.

I'll cut straight to the chase.  We've been buying bushels of apples for $22.75 from Bulk Natural Foods.  (I will do another post on BNF soon, but let it suffice to say that if you are in middle Tennessee and not taking advantage of this co-op, you are a fool!)

And what does one do with a bushel of apples, especially if one doesn't have a spare refrigerator or other cold cellar in which to store them?

One does what one can.

Which includes:  applesauce, pie filling, eating out of hand, dehydrating, cider.

First, a word about varieties.  We were able to pick from about fifteen different kinds of apples, and I had no idea what I was doing.  I knew that Red Delicious are often mushy, that Granny Smith are too tart for me to eat plain, and that the rest were somewhere in between.  For our first bushel, I ordered Cortlands.  I got the box, tore it open, pulled a rosy red fruit out to taste, and . . . it . . . mushed between my teeth.  Nothing more disappointing than wanting to crunch into an apple and getting mush.  But they made stupendous sauce and really good, thick, pectin-y cider.  They also had a creamy white flesh that dried really nicely.

Second go-round, I went with Cameos.  Got the box, ripped it open, picked one up, said a little prayer . . . and . . . CRUNCH!  Perfection.  Lovely, firm, crisp, juicy flesh.

For winter storage, I read up on how to keep them in a cooler in the backyard.  Apples need to be between 28 and 30 degrees for optimal lifespan, so a cooler in the shade in a Nashville winter is about right.  I packed them in layers between newspaper in a regular old Igloo cooler.  Make sure all the apples are good, because you know what they say about one bad apple . . . (it spoils the whole bunch, girl).


For sauce, you don't really need a recipe.  4 pounds of apples yields about 1 1/2 quarts of sauce.  From my first bushel, I put up 12 half-pints to give out for Christmas presents.  I just peeled, cored, and quartered 8 pounds of apples, added in a cup of water, and threw in a star anise and a few big chunks of fresh ginger.  I stewed it all until it was quite soft - maybe 2 hours.  At that point, the apples had fallen apart and the texture was just slightly chunky.  If you wanted it smoother, you could mash it or put it through a food mill.  I heated the jars, removed the star anise and ginger chunks, and funneled it into my half-pints.  Processed in a boiling water canner for 15 minutes.  Done!  I'm getting ready to put up a few more quarts this week for family usage through the winter.

I'm going to make pie filling this week with this recipe:  spiced apple pie filling.

For cider, we are lucky enough to have friends from church with an old-fashioned cider press!  (Hi Elaine!)  We went up there a couple of weeks ago for supper and cider pressing.  Vicki Jo got to experience a hen house for the first time, and was totally freaked out as she helped collect the eggs.  The Cortlands made great cider, but the yield wasn't too high.  About a half bushel yielded only a half gallon of cider.  We tore through that in about two days!  Freshly-pressed cider is not even comparable to storebought pasteurized cider.  But I'll drink that too.  The Cameos are much juicier, and I suspect they would yield more cider if pressed.

And finally:  dehydrating!  I don't have a fancy-pants dehydrator, and even if I did, I would have nowhere in my dang house to put it.  But I can do one better:  a giant convection oven at my place of employ!


I do about ten apples at a time.  Peel, core, slice thin, lay out on parchment (made this mistake once - never again!), put into the oven on lowest temperature and high convection until nice and dry - about 3 or 4 hours.


These are so addictive.  Like potato chips but really good for you and packed with fiber and with no nasty oils.  I can tear through a gallon size bag by myself in an evening.

So!  Apples.  There you have it.  Buying in bulk is super-economical (I'm paying roughly 55 cents per pound, which is about a third what these varieties cost at the market), and makes you feel really homemaker-ish as you stock your shelves with stuff that you made!

[This post submitted to Real Food Wednesday 12/11/13, Unprocessed Fridays 12/13/13 and Fight Back Friday 12/13/13.]